


Soy Page
Soy Related Programs


Soymilk
豆汁
by John Marshall

Soy milk is easy and cheap to make. It is a versatile binder for all fabric and paper pigments.
▶︎Place dry soybeans in a bowl and cover them with three to four times as much tap water by volume. Allow to fully swell.
▶︎Once the beans are fully swollen, drain off the soak water and rinse them briefly.
▶︎Prepare a sheet of cloth approximately 12-18" square by soaking it in water. Sack cloth or a scrap from an old sheet works well. Wring the water from the cloth and drape the cloth over the top of a large bowl.
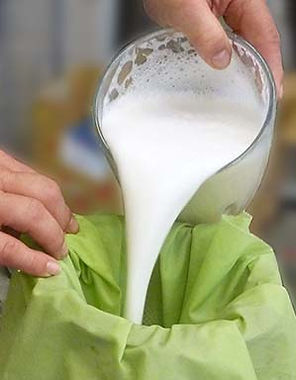
▶︎Next, grind the swollen beans by placing them in a blender with three to four times as much water. Blend on high or liquefy until the beans are well ground, approximately two minutes. Pour the mixture into the cloth. Pull the sides of the cloth up and strain out all of the milky liquid into the bowl.
▶︎Remove the soy crumble from the cloth and drop it back into blender. Add more water and repeat the process up to three times or until the liquid begins to thin considerably in concentration.
When all the batches are combined, you should have about the consistency of ‘regular’ grocery store cow’s milk.
One cup of dry beans will easily yield two cups of swollen beans. This in turn will yield enough soy milk to easily size seven to eight yards of 45" wide china silk.
Never be afraid to make more than you think you will need.
The soymilk may now be used in one of three ways:
▶︎As a pre-sizing applied before dyes touch the fabric to prevent wicking and allow for even coverage of dyes, and to help the dyes get a better grip on the fabric.
▶︎As a binding agent when working with pigments.
▶︎As a post-sizing to give your hand-dyed fabric that ‘finished’ look, and to help permapress the fabric in addition to making it soil resistant.
Pre- and post-sizing soymilk are applied in the same manner. Your fabric should be stretched taut on harite and shinshi. Using a jizomebake, work quickly to apply a very moist, but not drippy wet, layer of soymilk across the entire surface. Allow the soymilk to dry fully before going on to any further step (such as applying dye or paste).

Generally speaking, the soymilk used as a pigment binder is slightly thicker than the sizing liquid. Simply mix it with the pigment as if you were adding water to watercolor paints and use a surikomibake to apply it to your yardage.
It is important to keep the soymilk fresh. If it starts to sour, throw it out. Always allow your coat of soymilk to dry completely before adding more dyes or paste to the surface.
The soymilk becomes permanent through curing. Curing involves simply allowing the dry soymilk to sit around for a period of time. In a very warm, arid environment, this may be as short as three weeks, in a more moist or cool climate, it may take up to three months of patience.
Dry soymilk is very receptive to staining while it is fresh. This is what makes it so affective in any dye project. However, because the dry soymilk cures with time, it is important to get on with your project. Once you have passed the half-way point of curing, the soymilk begins to resist you efforts and become counterproductive.
If you are also using dyes that require steaming, feel free to do so. The steaming neither helps nor hinders the curing process of the dry soymilk.
Questions regarding the use of commercially available soymilk often come up–I don’t use it. Fresh soymilk is, well, fresh and at its best. Commercially available soymilk has been adulterated–either through steps to help preserve it on the grocer’s shelf, or through additives such as emulsifiers and flavorings.